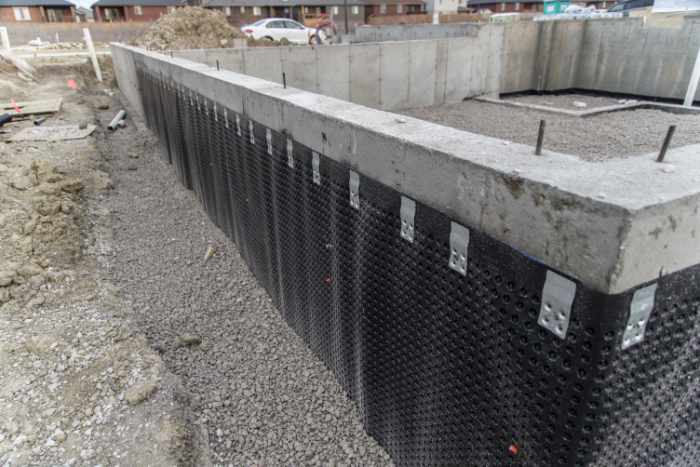
Is there water pooling on your basement floors? It’s time you waterproof your basement. Are you wondering how you’ll do that? Worry not; this article is a guide to basement waterproofing that will walk you through the process.

4-Step Guide to Basement Waterproofing
Moisture in your basement is characterized by mold, damp-like odor, and efflorescence, among others. Efflorescence is the white, form-like substance that forms on concrete surfaces due to moisture. None of this is good and it’s not what any homeowner wants for their home.
Waterproofing works by preventing water seepage into your basement; you can control this both internally and externally. Consider the source of the moisture before choosing a waterproofing method. Different methods work in different situations.
Take the following steps as you waterproof your basement:
1. Assess the Area
The first step in any guide to basement waterproofing is identifying the problem. For the interior of your basement, look for cracks in the walls and floor. Identify the source of water seepage into the basement. You’ll see wet patches on the floor or wall; these can be some of the sources.
Assess the cracks to find out if that’s the source of seepage. If not sure, cover the cracked areas using aluminum foil. Let the foil cover approximately a square foot and put it in place with tape. Leave it for 24 hours. Then check under the foil. If you see moisture on the inner surface, the crack is the source of water.
However, if the inner surface is dry, that’s not the source. Continue performing a condensation test until you find all the sources. Examine the extent of damage caused.
Seek professional waterproofing services for external basement waterproofing. To assess the outer walls of your basement, you need to excavate to expose the surface. Hire an excavator to dig along one wall or around the perimeter of your basement. Let the excavation depth be equivalent to the height of the footing and wide enough to provide a working area for the experts. Once the walls are exposed, professionals can now identify any cracks and the root cause of water seepage.
2. Clean the Area
Clean the surface where waterproofing will be done after the cracks have been identified. Remove any paintings or coatings on the wall or floor by using a wire brush or by sandblasting. Sandblasting should be done by a contractor. Waterproofing material works best when applied directly on the surface, masonry, or concrete. Wash the surfaces to remove dirt. Clean with a scrubbing brush, warm water, and dish soap. Add a small amount of bleach if mold is present on the surfaces. Rinse with warm water and allow to dry before going to the next step.
Remove any standing water on your basement floor and disconnect all electrical components before you begin any work. This prevents the possibility of falls and electrocution that may cause life-altering and fatal injuries.
Use a jet of water to wash the external walls to get rid of dirt and other stains on the surface.
3. Repair the Cracks
Use sealant injections to fill in the cracks in the interior of your basement. Drill deep holes along with the gaps that are to be filled at intervals. Inject the sealant into the walls through the drilled holes for effective basement waterproofing. The sealant will prevent water from seeping through the walls, preventing condensation. Some available sealants injected into cracks and holes are polyurethane foam and epoxy.
Fill the cracks and holes in your exterior walls with hydraulic cement. Most professionals prefer hydraulic cement since it hardens in a few hours, allowing faster finishing of the waterproofing process. Trowel the hydraulic cement for a smooth finish.
4. Apply the Final Waterproofing Material
No guide to basement waterproofing would be complete without finishing the process thoroughly and completely. We do this by applying a waterproof material or sealant that embeds itself well with masonry work for your walls. It’s best to use waterproof paint since it’s affordable, readily available, and you can do it on your own. The paint is sold when already premixed, meaning all you need to do is paint your basement walls as if you’re painting your bedroom. Apply two coats, letting each of them dry properly before applying the next coat. Waterproof paint is thick on application, making it watertight and perfect for preventing water seepage. This could also be used for your basement floor.
First, apply a liquid membrane on the external walls of your foundation with a trowel and give it a smooth finish. Consider adding a rubberized asphalt or a fiberglass waterproofing membrane before applying the second coat of liquid membrane. The mesh membrane provides extra waterproofing.
Follow the membranes with a drainage system. The drainage system keeps water away from your basement. Dig a trench along the external wall of your basement and lay a thin layer of gravel. Place a perforated drainage pipe and cover it with a membrane to prevent soil particles and other substances from getting into the pipe. Cover the pipe with several layers, approximately 14 inches deep. Once done, backfill the previously excavated area. Your external walls are now waterproof.
Takeaway
Always identify the source of the water seepage before covering a crack on your basement wall or floor. With the correct information and products, waterproofing your basement won’t be a difficult task. It’s best to seek professional basement waterproofing services for your external walls since external waterproofing requires some expertise, and can be quite challenging.


