The success or failure of a new flooring installation can hinge on more than just the end result you see and walk on. Many of the most important choices a homeowner makes take place during the flooring installation preparation stage. From selecting materials to testing the subfloor, avoid these key mistakes to ensure the flooring installation process goes smoothly and the end result adds comfort and value to your home for years to come. Let’s look at the six keys of proper preparation.
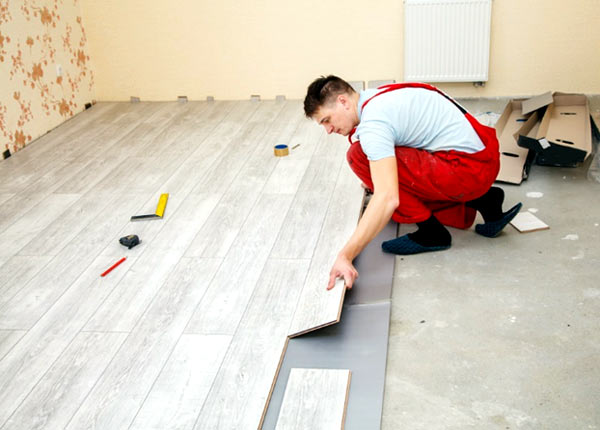
Flooring Installation Preparation Starts Weeks Before the Crew Shows Up
Many flooring failures are not due to the installation itself but rather to decisions made during planning.
- What kind of wood, and where did it come from?
- How was your subfloor built, and how old is your framing?
- Was your LVP all stored in the same conditions before the installation?
- How far do you want to push your luck on deflection?
The answers can come back to bite you decades down the road. Subfloor and joist quality in particular is going to play a big role in your flooring’s long-term health. Buy the absolute best quality you can find, or be prepared to replace damaged sections as long as you own the home.
Decision 1: What’s Really Under Your Current Floor
The first decision on our list of flooring installation preparation is foundational. Before you order a single plank, you need to know what’s beneath the surface you’re replacing. Squeaky boards, soft spots, and uneven areas in the subfloor don’t disappear when you cover them – they telegraph straight through the new material, sometimes within months. A subfloor that flexes underfoot pressure will crack tile grout or create visible seams in laminate, no matter how good the installation crew is.
This is also where moisture testing needs to happen, especially for below-grade installations or homes with concrete slabs. Excess moisture in a slab causes adhesive failure, warping, and mold under the new floor – issues you won’t see until it’s too late.
If your home was built before the 1980s and you’re removing old vinyl, tile, or the mastic underneath it, add asbestos testing to this list too. It’s a five-minute discussion that can save you from a much bigger and more expensive remediation project later on.
This is the exact point in the process where it pays to put your job in the hands of a professional contractor. A qualified team like Twin State Flooring will find, and ideally fix, most of the common issues that can impact the long-term success of your new floor. They’re human, though, and subfloors are devilishly good at keeping their secrets, so it’s better to assume that even if you do everything by the book before installation, something could go wrong and you should find out who will be picking up the bill the second time. If it’s not them, you’re probably best advised to find a different, more experienced installer the first time.
Related: Basement Flooring Options You Should Check Out
Decision 2: How Long Your New Material Needs to Sit Before It Goes Down
Did you know that depending on the type of flooring you choose, there are various amounts of time the flooring material needs for its own flooring installation preparation?
Hardwood or engineered wood? These are the first decisions when you’re remodeling your floors.
The second one? How long can you wait from the time you order the material to the time you’re trotting across the polished space in your socks? Give the wrong answer and you’ll have a bunch of cranky trades. Give the wrong answer for radiant-heated floors and you’re back in the market for an all-new floor.
Hardwood and engineered wood aren’t “drop-in” materials. The wood, depending on species, cut, and finish, should ideally sit in the actual room in which it’s to be installed for 48 to 72 hours prior to installation to acclimate to the room’s temperature and humidity. This reduces post-installation shrinking, cupping, or gapping that can drive you nuts as the seasons change and your new floor keeps trying to reinvent itself.
No two ways about it: You’ve got to order in time to let this happen. If the master carpenter already has your job and two others lined up and your material is two days late, you’re waiting more than 48 to 72 hours for the next available slot. So, the rule is: Order your material in time for it to ship, and time that so the 48-to-72-hour acclimation period hits the scheduled installation date.
Decision 3: What Happens to Dust, Air, and the Rest of Your House
Even supposed low-dust installation methods create dust that spreads much further than most people realize. Sanding generates dust that travels through HVAC returns and into rooms far from the job site. The same goes for cutting and any kind of demo work. For dust and fumes, if nothing else, turn off the forced-air system and close registers. If you want to get fancier, consider a negative-pressure fan to exhaust dust to the exterior and a HEPA vacuum for cleanup.
Dust isn’t just an annoyance. It can also ruin freshly applied finishes. Wipe down your project every day with a damp towel and cover freshly applied finishes every night. Don’t uncover them until you have thoroughly vacuumed all surfaces the next morning. Enclose the sanding site with plastic sheeting walls and create a floor-to-ceiling plastic entry, secured with both Velcro tabs at the edge of the plastic and a double-sided zipper.
Decision 4: Where Pets and Kids Go During the Noisiest, Dustiest Days

Here’s some flooring installation preparation that you might not have thought about. Flooring crews use nail guns, saws, adhesives, and sharp tools, all of which are typically left out in the open during active demo and installation. A curious toddler or dog is a genuine safety concern during this phase, and “we’ll just keep an eye on them” is not a plan.
Write down an actual plan. It might involve sequestering pets and kids in a finished part of the house with the door closed, or possibly even arranging a sitter or boarding for the loudest days of the project.
This isn’t overcautious – it’s simply the same kind of planning you’d do for any contractor working with power tools and chemicals in your home. Deciding this in advance also means the installation crew isn’t interrupted managing a loose dog or answering a kid’s questions about the nail gun.
Decision 5: How Rooms Connect to Each Other
The transition from one room to another is one of the most underrated aspects of flooring prep. This is a decision that needs to be made before the new floor is laid, as it will be impossible to fix without a mess once the installation is done. T-moldings, reducers, and step-downs must all be put in place as part of the installation process – not left for the crew to puzzle over at the job’s completion.
This decision then demands a larger one: does your home’s flooring flow from one room to the next with the same material, or does it change at each and every doorway? A house with too many distinct flooring options can feel like a patchwork and will certainly feel that way when the conversation turns to resale. Potential buyers walking through a house can tell the difference between a well-laid and cohesive floor versus one that’s been pieced together.
Doors are also part of this: new flooring and new underlayment all add height. Doors that previously had no problem swinging over carpet may now scrape when they try to open over a generously padded hardwood. Some doors may need to be trimmed, and it’s easier to schedule that before the floor installation than to leave it as a nasty surprise for the finishers.
Decision 6: What You’re Actually Paying For
The price per square foot that you are quoted hardly ever covers everything you need for a new floor. The underlayment, quarter round or base shoe, adhesive or grout, disposal of the old flooring, and baseboard replacement or shoe molding height extension to cover the necessary expansion gaps for many types of flooring can amount to 10 to 20 percent on top of the quoted install price. None of these are hidden costs in the “how did I owe two grand more than I expected?” sense so much as they’re granular details that don’t get considered until you ask for a number.
All of that leads us to this next point: you can’t possibly get an accurate quote until the salesperson has seen the actual space and you’ve made some important stylistic and functional decisions. Like baseboards for instance. The old ones may come off with the old floor. If you want a true floating floor that can expand and contract freely, shoe molding must be added and painted or stained to match your baseboards.
Do you want to paint the new baseboards yourself or is that part of the deal? Do you want modern chunky baseboards or a slimmer profile that more closely matches the dimensions of crown molding in the same room or your house’s existing architraves for that matter? Best to figure that out before you start chasing sales and specials on faux wood and sheet vinyl.
This is also where material choice and resale value intersect. According to the National Association of Realtors’ 2022 Remodeling Impact Report, new wood flooring recoups roughly 118% of its cost at resale, making it one of the highest-return home improvements a homeowner can make. A medium-tone hardwood or a premium LVP in a neutral shade tends to have broader appeal than something trendy or unusually dark, and that broader appeal matters if you plan to sell within the next several years.
Talking to Your Installer Before Day One
Proper flooring installation preparation means taking a short pre-install walk-through with your crew before you start. This can save you a lot of time and heartache on the back end. Is power access situated in an awkward spot for them, or one that requires you to be home while they run cables outside? If they’re using your water supply, is there a convenient source for that as well? Where will they park their vehicles and store equipment during the project?
A 10-minute discussion also allows you to orient them to any specific issues in your home: radiant heat, for example, or that downstairs room that tends to be a bit musty. The same flooring material can perform completely differently across these conditions, and a good installer will adjust underlayment, acclimation time, or even material recommendations based on what you tell them. Make sure they know how intense the sun gets when it comes in through those south-facing windows on a hot afternoon.
Finally, do a room-by-room walk with your installer and document any existing damage – scuffed walls, loose trim, an already-cracked window sill. This ensures there’s no dispute later about what was there before they arrived. Furniture relocation is worth confirming explicitly too. Installers rarely move heavy or fragile items – china cabinets, pianos, large sectionals – without additional fees, and some won’t move them at all for liability reasons. If you’ve got large pieces, arrange for them to be moved before the crew arrives, not on the morning of installation.
The Floor You Live with Is the Floor You’ll Sell
Each decision you make beforehand – the temperature and humidity check, the time flooring sits in the room, the layout planning, your product selection – reveals itself twice: first in the quality of everyday life you enjoy in your home, and second in what you present to a buyer when it’s time to sell. The key is to view the installation as the project itself, not the warm-up act to the show.